LINE TOOL- select and transform line (17-04-25)
LINE TOOL:
The line tool is used to draw the line. The line shortcut is backslash "\".
the line is selected can be done in two ways:
1.selection tool - full of the obj
2. direct selection tool - part of the object
The obj can be selected by clicking on it and drag it which cover overall obj.
Line transformed in in 3 ways
1.scaling
2.rotation
3.move
name of tool: line
shortcut: "\"
method: click drag leave
tips:
- shift + drag gives 45 degree interval line
- alt + drag get symmetrical line
- alt + shift + drag get symmetrical and 45 degree line
- click + drag + tilt button drag get multiple lines, first leave cursor after leave tilt button.

About fills and strokes:
A fill is a color, pattern, or gradient inside an object. You can apply fills to open and closed objects and to faces of Live Paint groups.
A stroke can be the visible outline of an object, a path, or the edge of a Live Paint group. You can control the width and color of a stroke. You can also create dashed strokes using Path options, and paint stylized strokes using brushes.

Fill and Stroke controls
Controls for setting the fill and stroke are available in the Properties panel, the Tools panel, the Control panel, and the Color panel.
Use any of the following controls in the Tools panel to specify color:
Fill button |
| Double-click to select a fill color using the Color Picker. |
Stroke button |
| Double-click to select a stroke color using the Color Picker. |
Swap Fill And Stroke button |
| Click to swap colors between the fill and stroke. |
Default Fill And Stroke button |
| Click to return to the default color settings (white fill and black stroke). |
Color button |
| Click to apply the last-selected solid color to an object with a gradient fill or no stroke or fill. |
Gradient button |
| Click to change the currently selected fill to the last-selected gradient. |
None button |
| Click to remove the selected object’s fill or stroke. |


Object Duplicating:
1. copy and paste
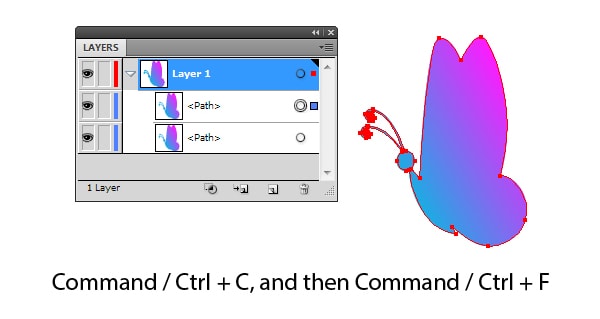
An object can be duplicated in Adobe Illustrator by copying it (Command / Ctrl + C) and pasting it to the front (Command / Ctrl + F) and to the back (Command / Ctrl + B). A new object will be located above or beneath our original object and the contours of both objects will match.
2. Duplicate path
When you select the sublayer in Layers panel (Window > Layer) you will have an opportunity to double the object by selecting Duplicate “<Path>” in the fly-out menu.
3. Alt and Drag
By the way, I always work with open Layers panel, this allows following the changes and controlling the objects in the work process.
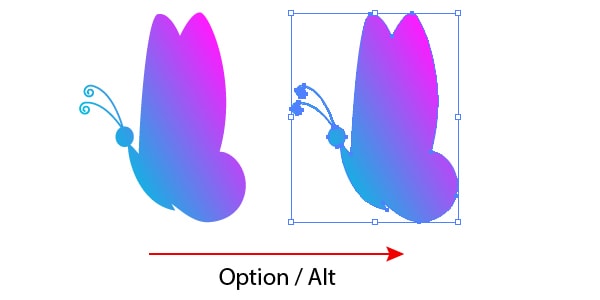
It is often necessary to place a copy of an object in some new place. In order to move and double an object, keep Option/ Alt keys selected while moving.
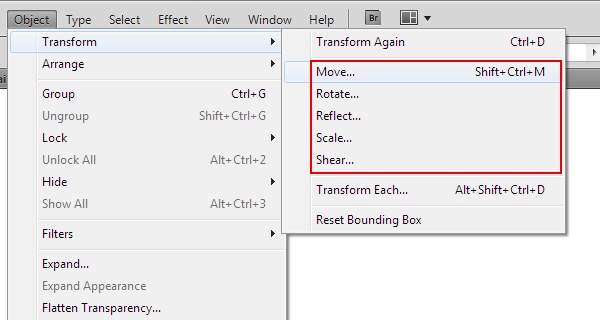
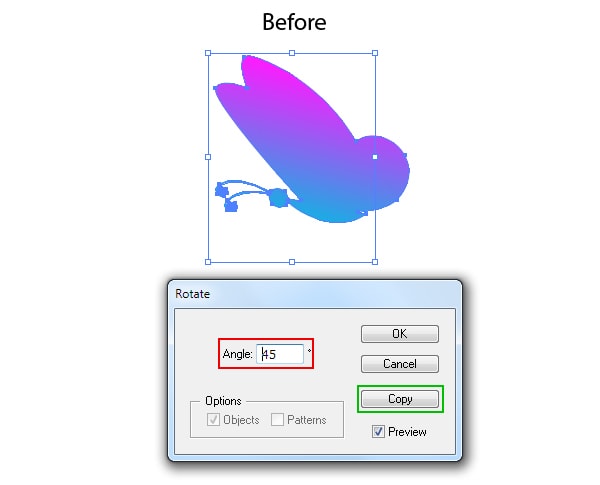
There are 5 commands in the “Object” Menu (Object > Transform > …) which can transform objects to specified value. These are Move, Rotate, Reflect, Scale and Shear. Any of these commands opens the dialog box in which you enter the required parameters, for example the rotation angle.
All dialog boxes of these commands have Copy button, when the copy button is clicked the object will be transformed and doubled.
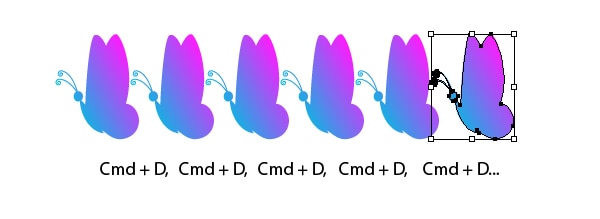
5.Multiple duplicate object with ctrl D
There is also a useful command Transform again (Command/ Ctrl + D) in the menu Object > Transform >….
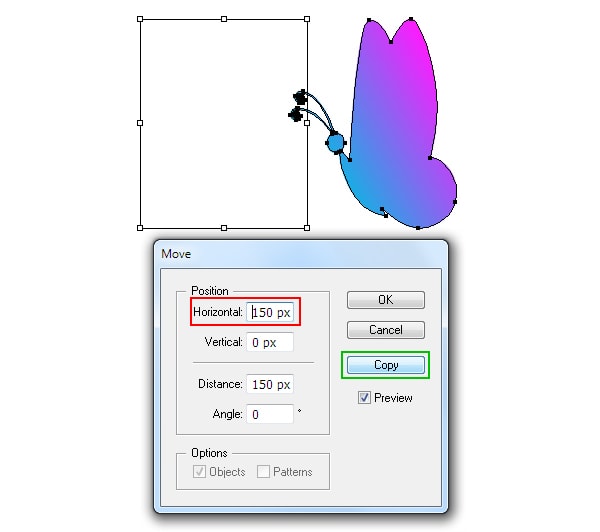
Let us see the practicality of this command. Suppose we need to place the same objects on a given distance from each other. Select the object, then go to the Object > Transform > Move… and set the move value in the dialog box; then click on Copy button.
Now the usage of Command / Ctrl + D shortcuts will repeat the last action, i.e. will double and move the selected object in this case.
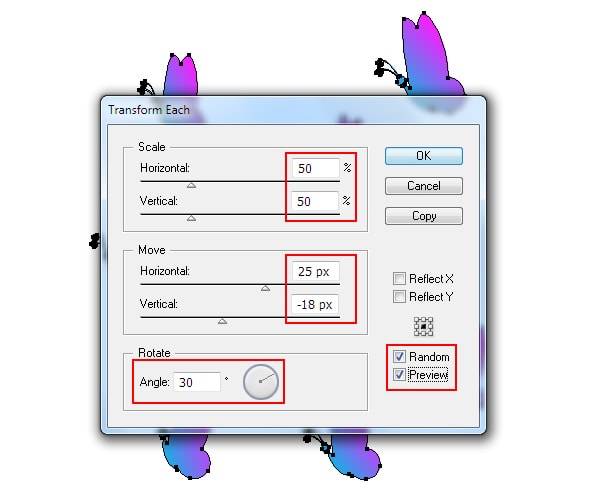
6. Multiple duplicate different size obj and angle using transform each command
The other command, Transform Each, from the menu Object > Transform >… allows us to make a couple of transformations with an object or some objects at the same time. Let’s check how we can apply it to a couple of objects.
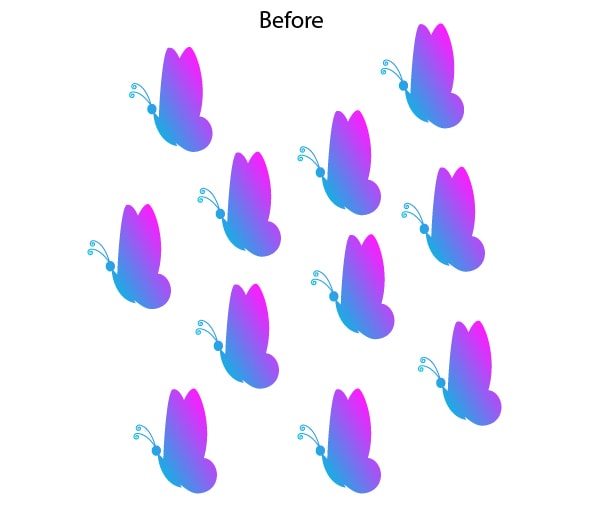
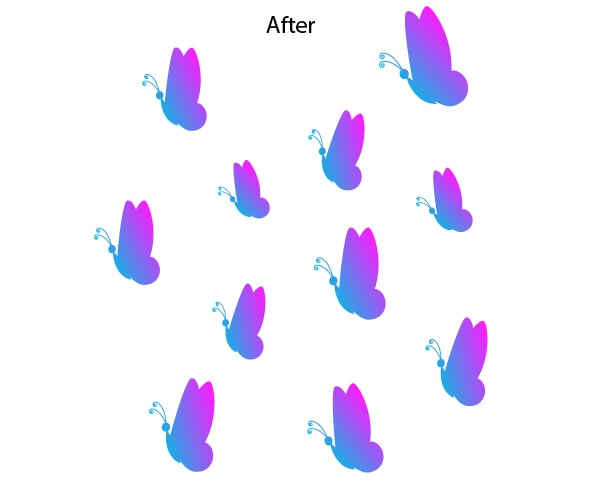
Select the objects, then go to Object > Transform > Transform Each…. Now reduce the Scale value and set any value for the move value and rotation angle, and then tick Random and Preview.
As you can see, we quickly made some diversity in our composition.


Comments
Post a Comment